|
11 Nov 2006
Go to Add/Remove Programs -> Add/Remove Windows Components


http://www.no-ip.com/support/guides/web_servers/setting_up_iis.html
How to set up IIS to host your website.
IIS? What on earth is that? For those that don't know, IIS (Internet Information
Services) is Microsoft's web / mail / ftp server. In this tutorial, we will be
ignoring the mail and ftp server side, and concentrating on the web server
(Incidentally, there are much better mail and ftp servers available for windows
that the ones provided with IIS, but the web server provided, I feel, is one of
the best that you can get for Windows.
IIS is provided as standard with Windows 2000 (Professional, Server and Advanced
Server), Windows XP Professional Edition, but not with Windows 95/98/ME or
Windows XP Home Edition, so if you have one of the last 4, you need to
upgrade…..sorry :) Windows NT also contains IIS but I have no experience with
that so I cannot say how well this article will apply to it (but it can't be
that different I am sure). Firstly, before setting up the web server, I strongly
recommend going to http://windowsupdate.microsoft.com and installing all service
packs, hotfixes and patches that are available (make sure that you are protected
against Code Red in 2000/NT and the UPNP problem in XP). Remember to check back
there every few weeks while your server is running, to make sure your computer
is protected against security flaws that will inevitably arise in windows. Also,
if you are on Windows 2000, apply the code red patch.
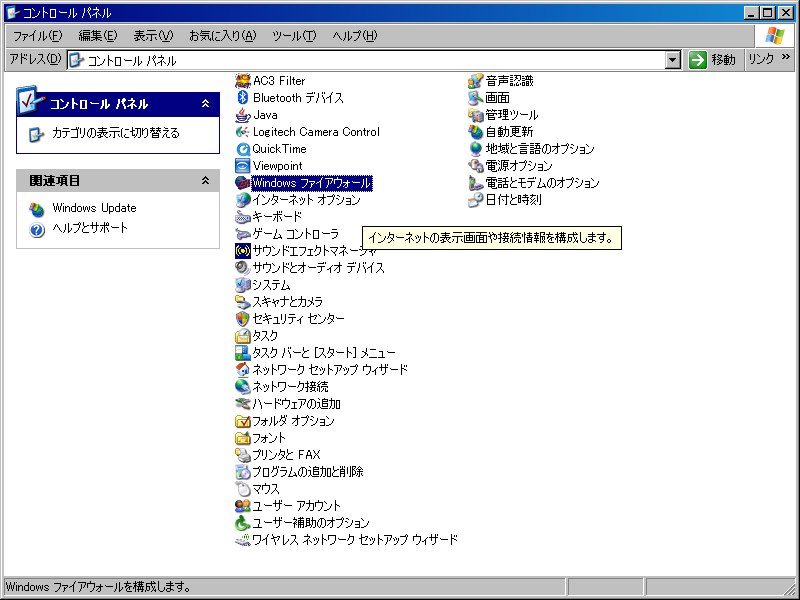
Now that your system is as secure as it can be, it is time to install IIS. Go to
Add/Remove Programs in Control Panel, and then click the Add/Remove Windows
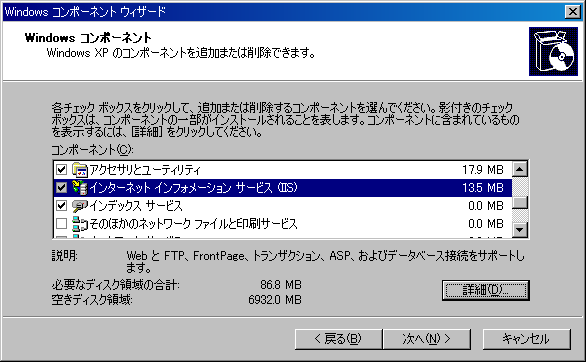
Components (1) button on the left of the window that pops up. You will be told
to wait for a few seconds, and then the Windows Components Wizard will pop up.
Double click on the Internet Information Services (IIS) entry (2) and the IIS
window will pop up (3). A list of IIS components appears and you need to check
the ones that you want to install. Check the boxes next to the following, but
make sure all the other boxes are unchecked:
Common Files
Documentation
Internet Information Services Snap-In
World Wide Web Server
Click OK and you will be returned to the Windows Components Wizard. Click Next
and IIS will be installed for you.
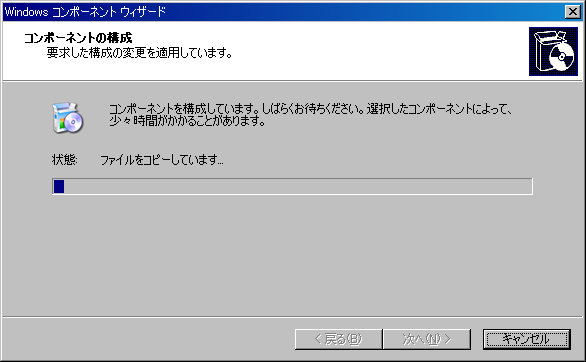
During the installation, you may be asked to provide your windows CD, if you
are, put it in and click OK. When the installation has finished, click Finish,
then click Close to close the Add/Remove Programs window.
Now you need a web site to host, and I am assuming you have already made one.
Make a new folder in the C: drive called WEB_ROOT, and copy your web site into
there. Now you need tell IIS that this is where your web site is. Right click on
My Computer on the desktop and go to Manage. The Computer Management applet will
now open, and IIS is found in Services and Applications. Default Web Site (2)
will appear under IIS, and you need to right click on that and go to Properties
(In the photo below, mine appears as WAP, but it is just because I have renamed
it, as I am about to show you!). This is the main section for adjusting the web
site options, and it is here you will change anything to do with your site.
Type a description of your site in the Description box like My Web Site or
davidsite.no-ip.com so that you recognise it in future. Note I have called mine
WAP as I am hosting a test WAP site at the moment. Next time you open Computer
Management, instead of saying Default Web Site, it will say the name you type in
here. Note that when people are looking at your site, they will not see that
name at all, ever. Click on the Home Directory tab, and type C:\WEB_ROOT in the
Local Path box. Now click on the Documents tab; make sure that Enable Default
Document (3) is checked, and then click Add. Type in the name of your first page
of your web site that you want people to see (usually index.htm, or index.html),
then click OK. Select that document in the list, and then use the arrow buttons
to move it to the top. Click OK (4) at the bottom of the window to return to the
Computer Management window.
Select your site, and then click the play button at the top right of the window.
This will start the server, and allow people to see it. If you want to stop it,
press the stop button, but when it is stopped, people won't be able to see your
site.
Close the Computer Management window and open Internet Explorer. Type
http://localhost/ in the location box at the top, and then press enter. If all
has gone well, your website should appear and you should be able to navigate it
like any other website.
Now anyone can access your site by typing in http://<your-ip>/ where is your IP
address. An IP address is a unique number which defines a computer on the
internet, so your IP address defines your computer on the internet. To find out
you IP address, go to Start>Run and type in cmd and press enter. Then type
ipconfig and press enter.
Your IP address for your internet connection will be shown (1). It will be 4
numbers from 0 to 255 separated by periods (.), eg 62.7.43.219, but this is hard
to remember and tell people, which is where No-IP comes in. Set up a redirection
to your IP address using the No-IP free service, and then when people type in
the name you have chosen, they will see your site.
Finally, in closing, a few seemingly obvious things which are often forgotten:
In order for people to see your website, your computer needs to be turned on and
connected to the internet (which is why DSL or cable connections are good),
people looking at your website will use your bandwidth of your connection,
meaning that if you are on a modem, it will be slow for you and slow for people
looking at your site (another reason DSL or cable is good), if you have a
dynamic IP address (it changes when you go offline) you will need to update the
No-IP records with your new IP when you reconnect to the internet, using the
No-IP website or an update client, otherwise your site will not be accessible
via your No-IP domain name.
|
